
Bitbucket Cloud repo setup
Important: the APIs used by Bitbucket Data Center and Bitbucket Cloud differ, resulting in a different setup as well. Consult this page if your repo is in Bitbucket Data Center.
Several steps must take place first on the Bitbucket Cloud side.
Create a Bitbucket Cloud Access Token
To give the Model Hub access to fetch models from a Bitbucket Cloud repository, it is necessary to configure access using an access token.
There is three main types of access tokens for Bitbucket Cloud (used for scripting, CI/CD, and API access), scoped to different levels of access:
- Access tokens for a Repository: grants access to a single repository with permissions (scopes) set at creation. This is ideal for tasks like managing one repository or providing a CI/CD tool access to a single code source.
- Access tokens for a Project (Premium feature): provides access to a single project and all repositories within it. The permissions are defined during token creation, useful for managing or accessing multiple related repositories in one project.
- Access tokens for a Workspace (Premium feature): offers the broadest access, covering the entire workspace, including all projects and repositories. Permissions are specified at creation and allow for managing the entire workspace or accessing its contents.
For the Hackolade Model Hub, you need an Access Token for a Repository:
- navigate to the repository of your organization
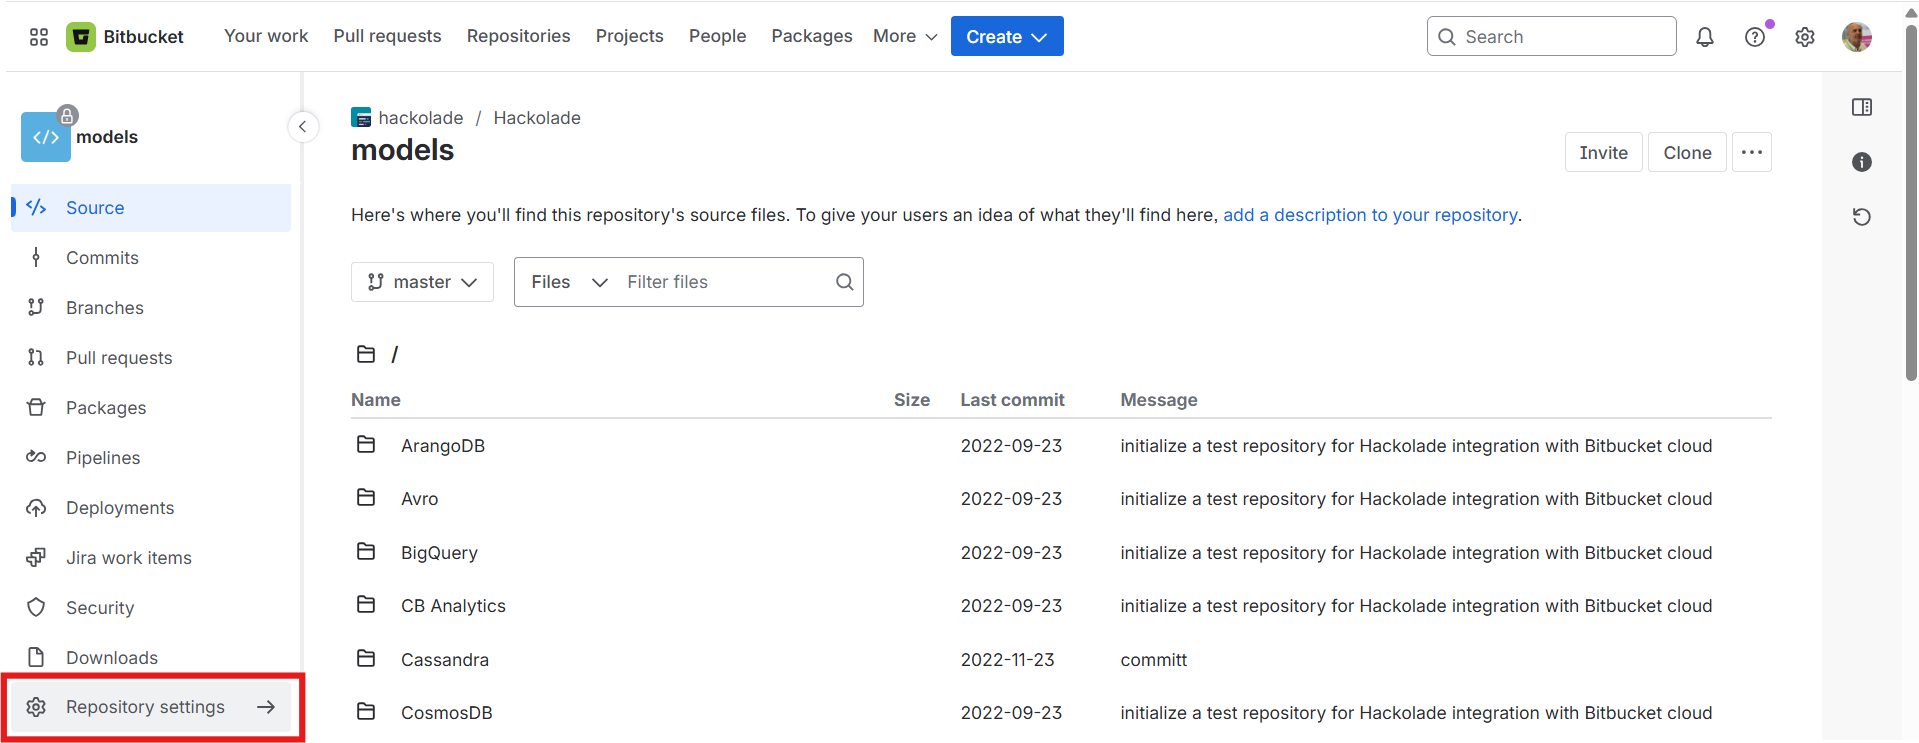
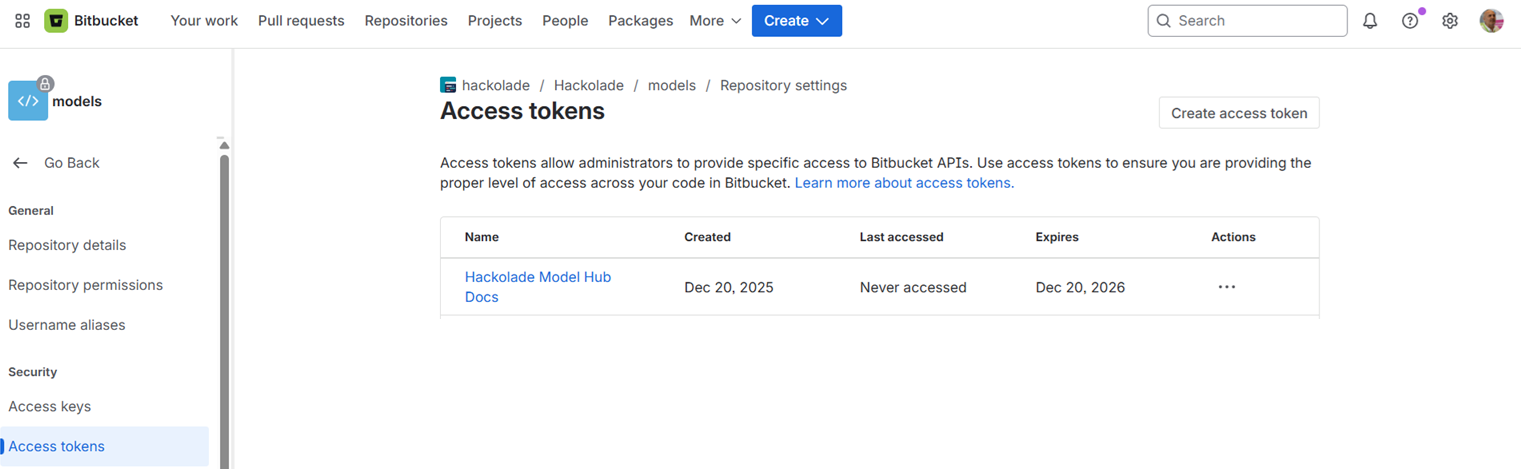
- in the side menu and select Repository settings, then choose Access tokens.
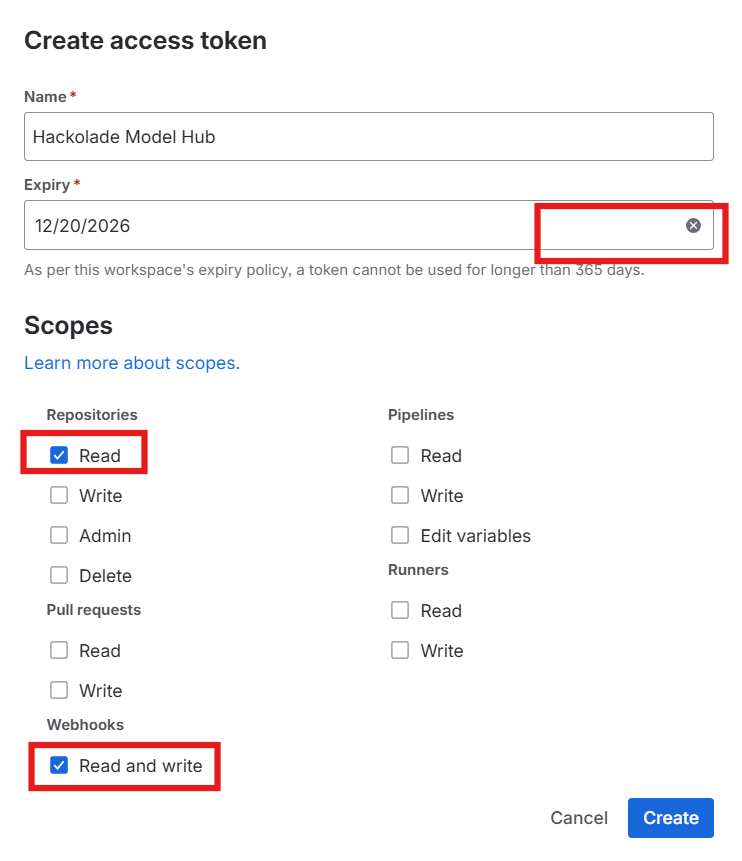
- click to Create a token.

- Assign to the token the following scopes: Repositories > Read, and Webhooks > Read and write
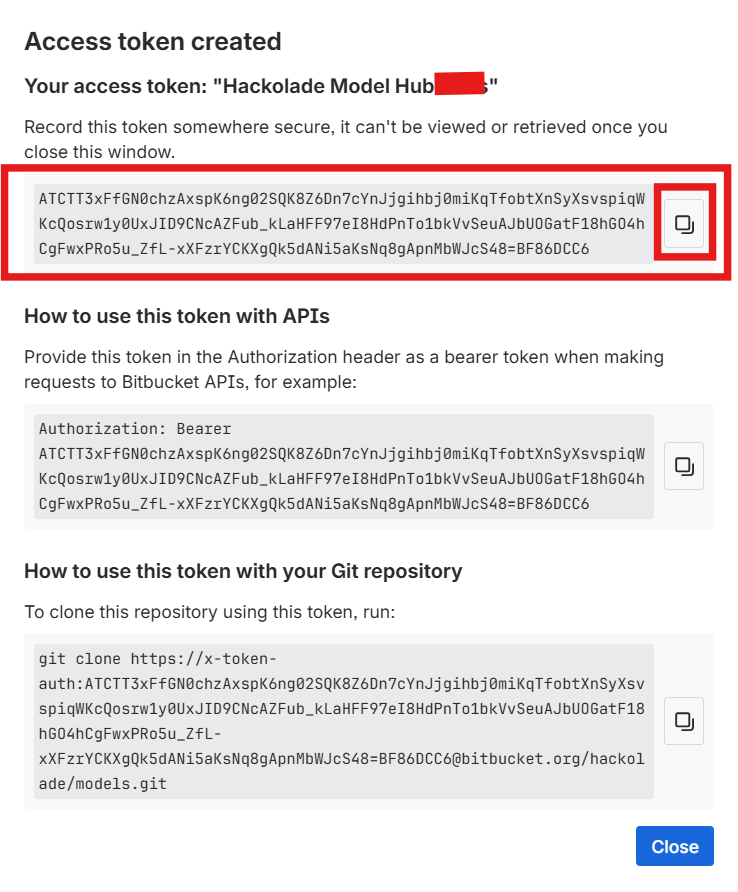
- Save the generated token securely. You will use this token later to configure the Git provider integration within Hub.
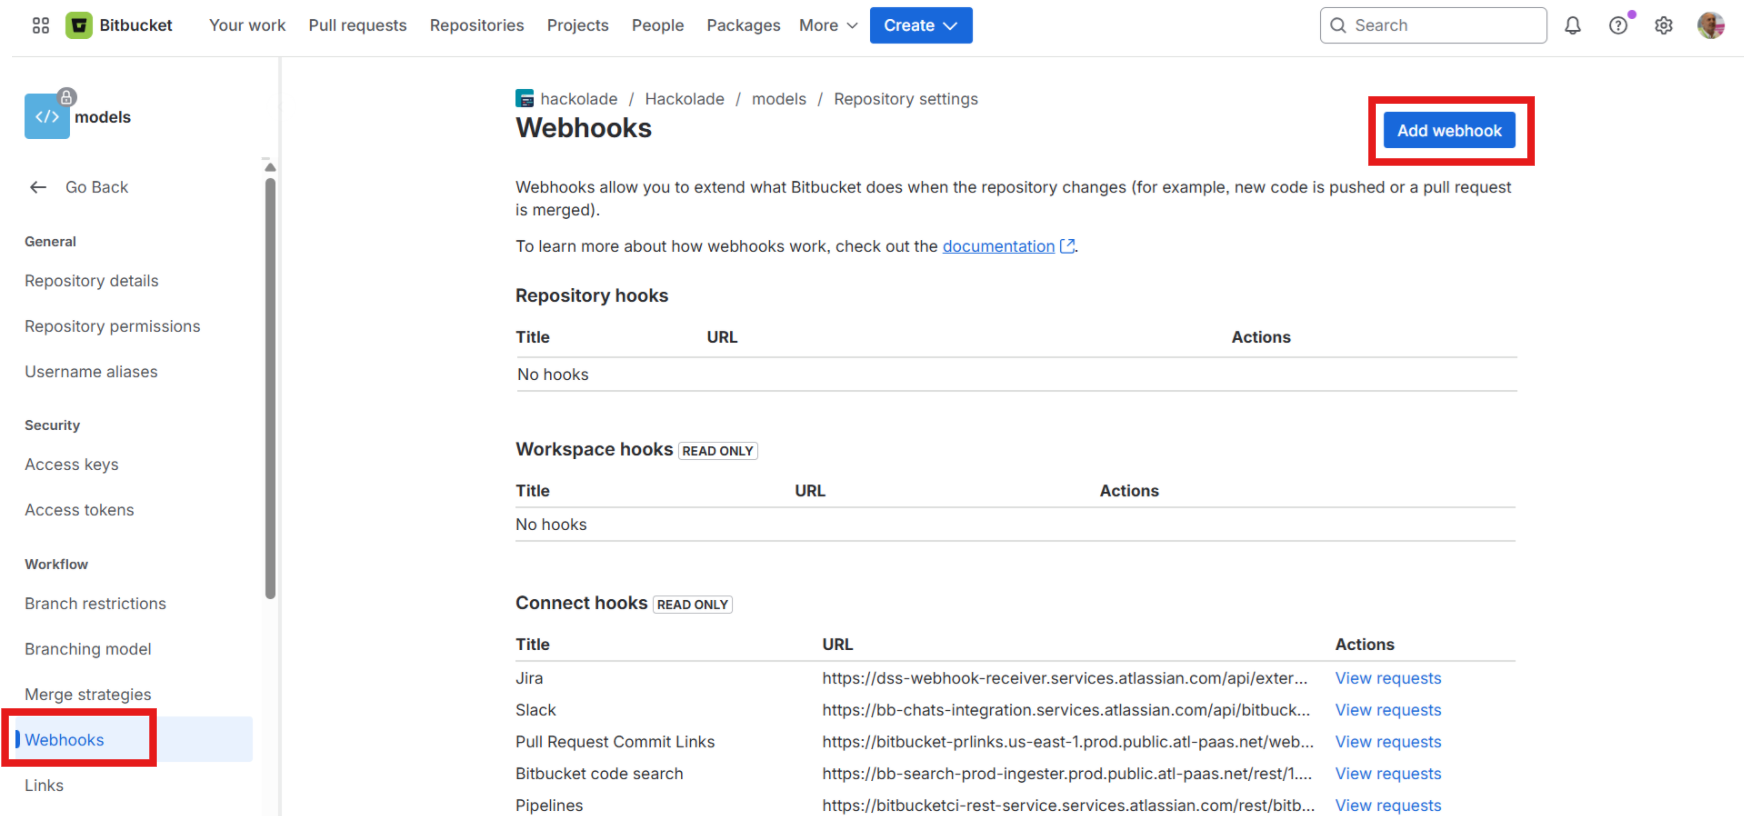
Create a Bitbucket Cloud Webhook
Webhooks in Bitbucket Cloud provide a way to configure Bitbucket Cloud to make requests to an external service whenever certain events occur in Bitbucket Cloud. They allow automation of workflows by triggering actions in other tools or services immediately after those events happen, without the need for continuous polling.
This is how the Hackolade Model Hub gets notified of the creation of a new model or change to an existing model in any folder of the default branch for your repository, or repositories.
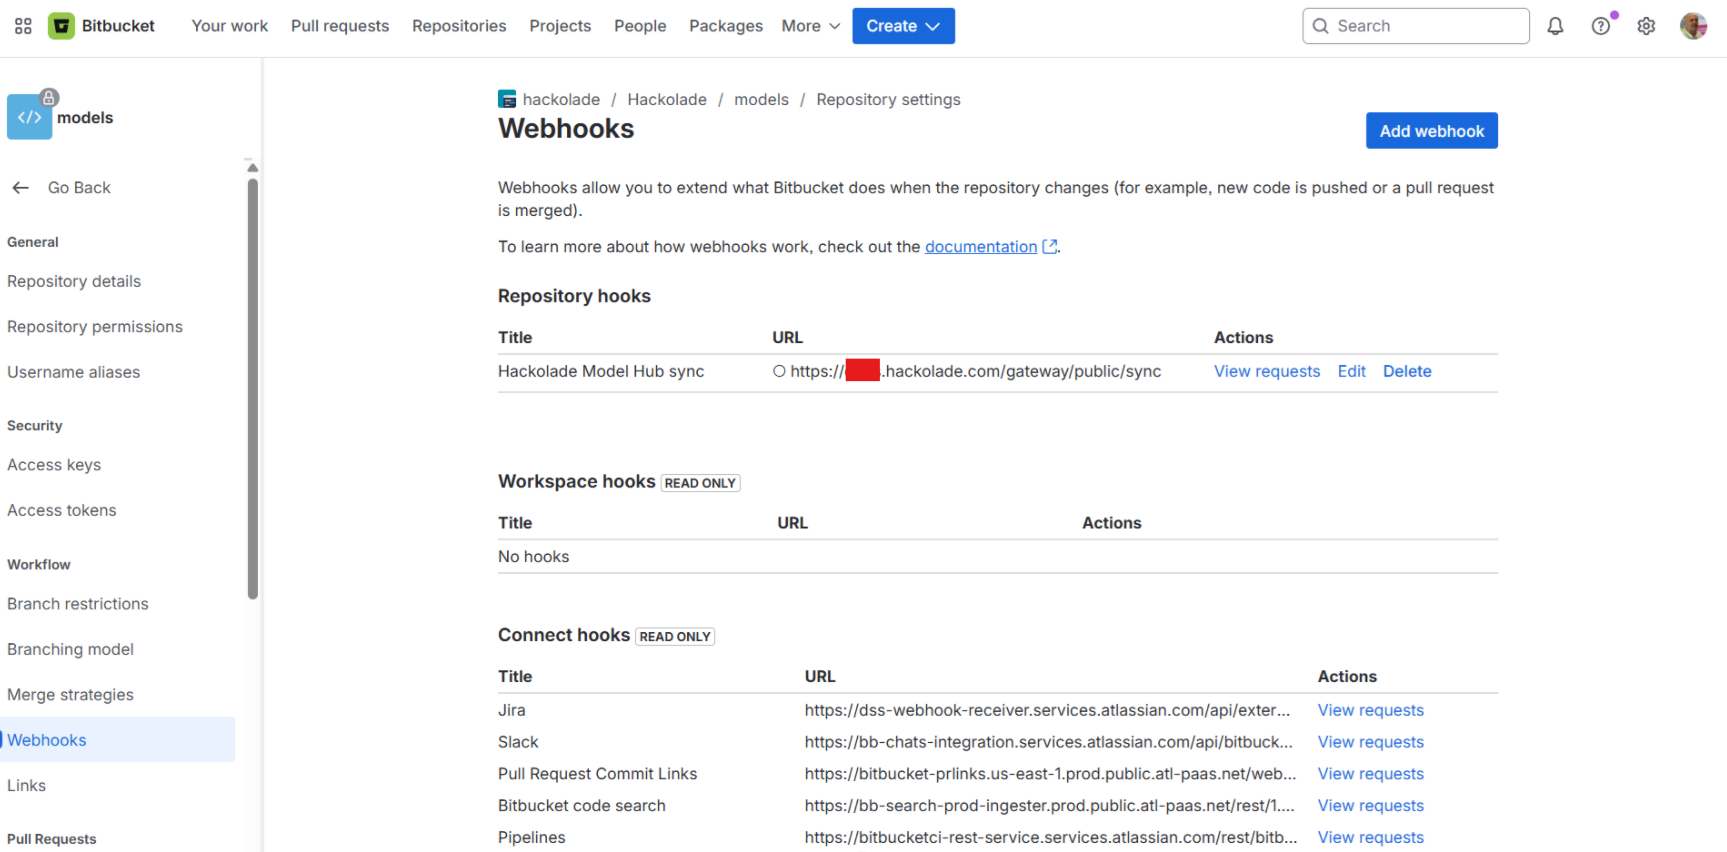
You may create one webhook per repo. But then you MUST use the same webhook "Secret token" (not be confused with the access token) for each webhook of each repository.)
To create a webhook in Bitbucket Cloud so that it notifies the Model Hub when changes are pushed to the repository:
-
In Repository settings, navigate to the Webhooks page from the side menu.
-
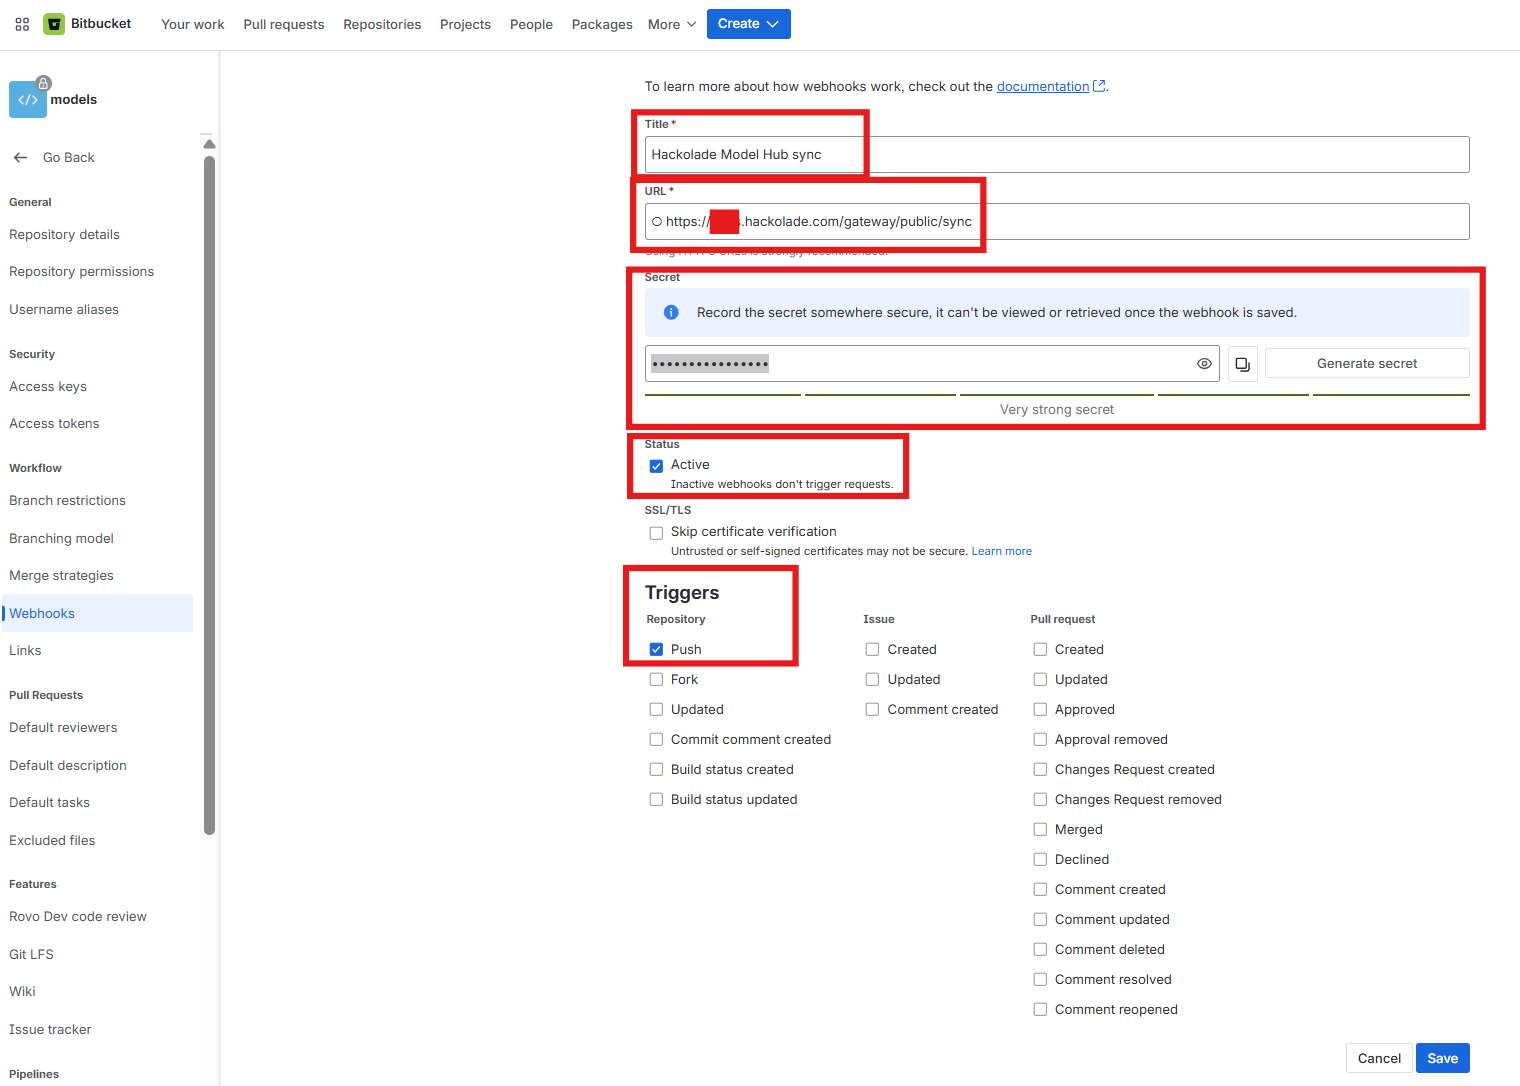
Click Add webhook and enter the following details:
- Title: Give the webhook a descriptive name (e.g., Hackolade Model Hub sync).
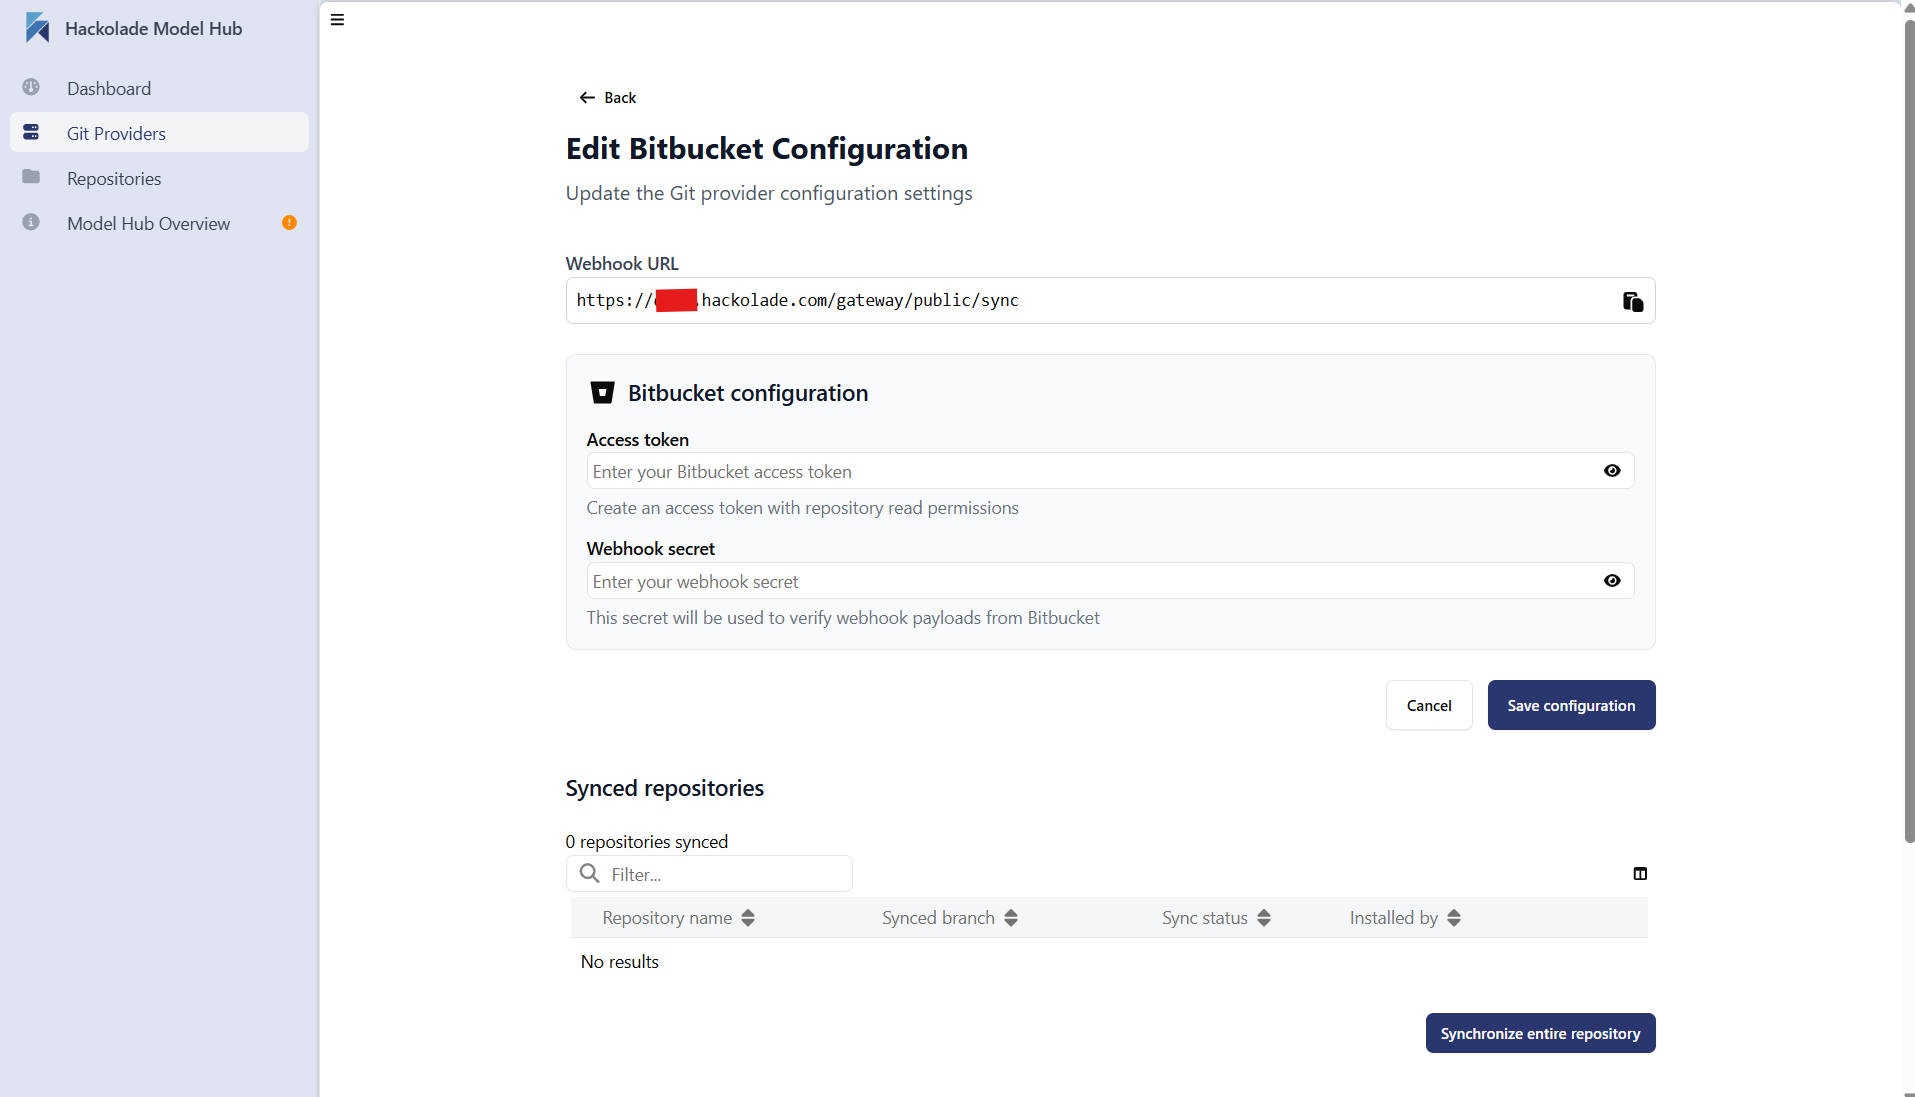
- URL: Enter the sync endpoint of your Model Hub domain, which is typically formatted as the Hub URL followed by the specific endpoint. Example: https://<your organization>.hackolade.com/gateway/public/sync
- Secret: create and preserve in a safe location the secret to be used to validate the webhook request
- Status: Set the status to Active.
- Triggers: Configure the trigger to be a Repository Push event (often the default option).
-
Save the webhook configuration.
Webhook secret: NgeIPWQn!YnZ9fvR
Create the Model Hub configuration
Once the previous steps are all completed, go to the the Git Providers tab of the admin panel, then click on the button + setup Git Provider, and select Bitbucket Cloud.
Webhook URL: enter the sync endpoint of your Hackolade Model Hub, and already used above. This typically follows the format: /gateway/public/sync endpoint of your Model Hub domain (e.g., https://<your organization>.hackolade.com/gateway/public/sync)
Use the Access token and Webhook secret token saved during the execution of the previous steps to configure the Model Hub.
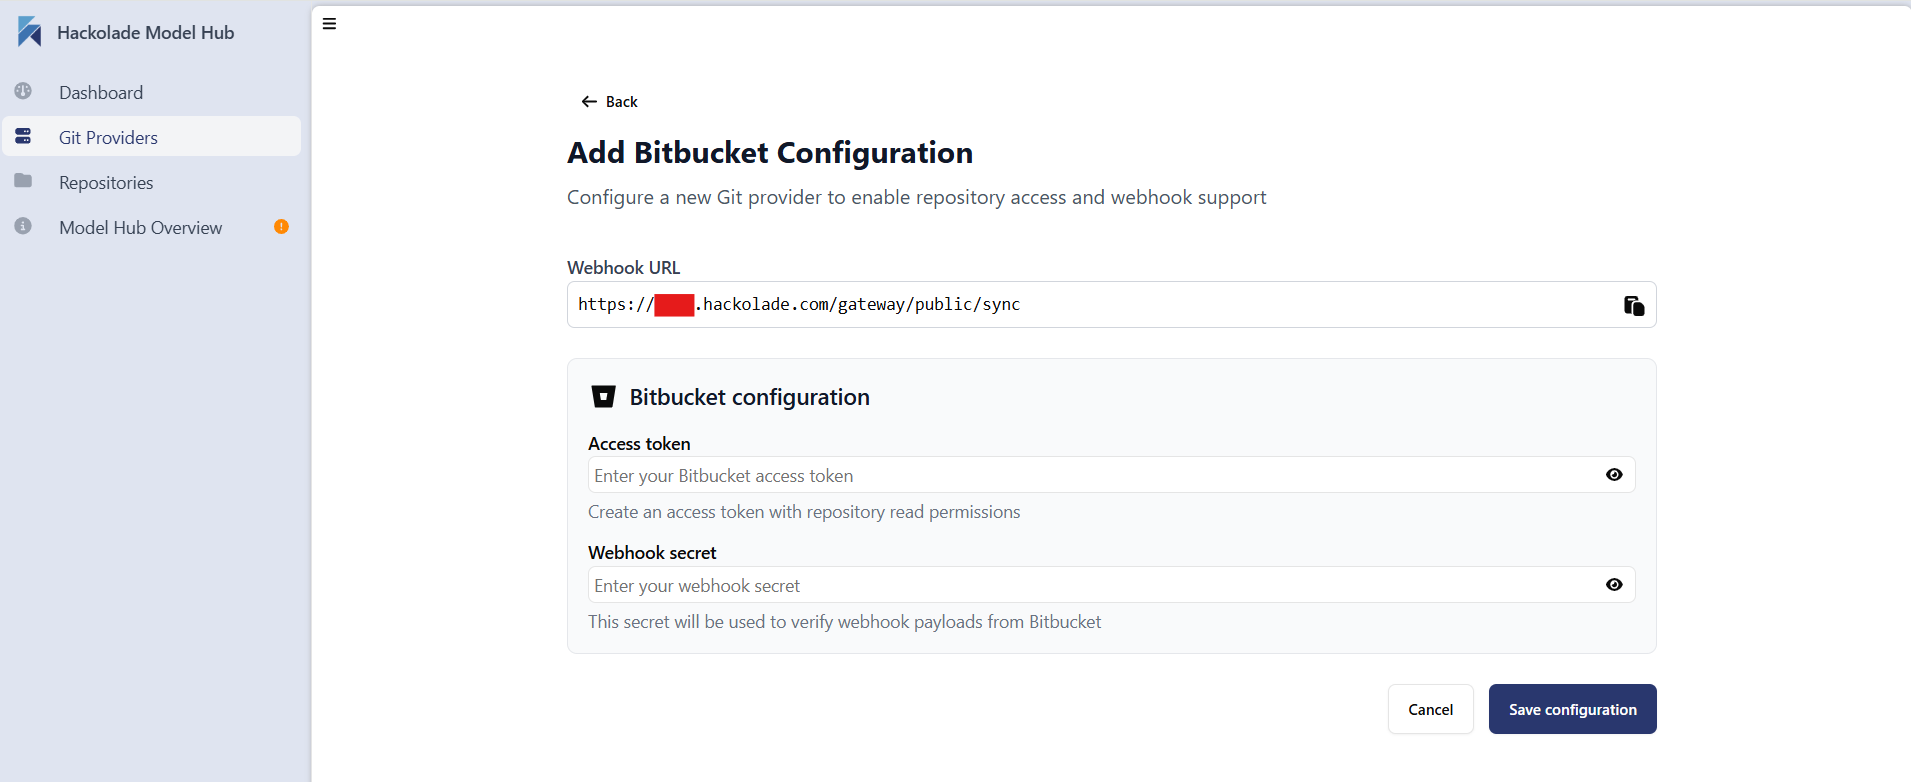
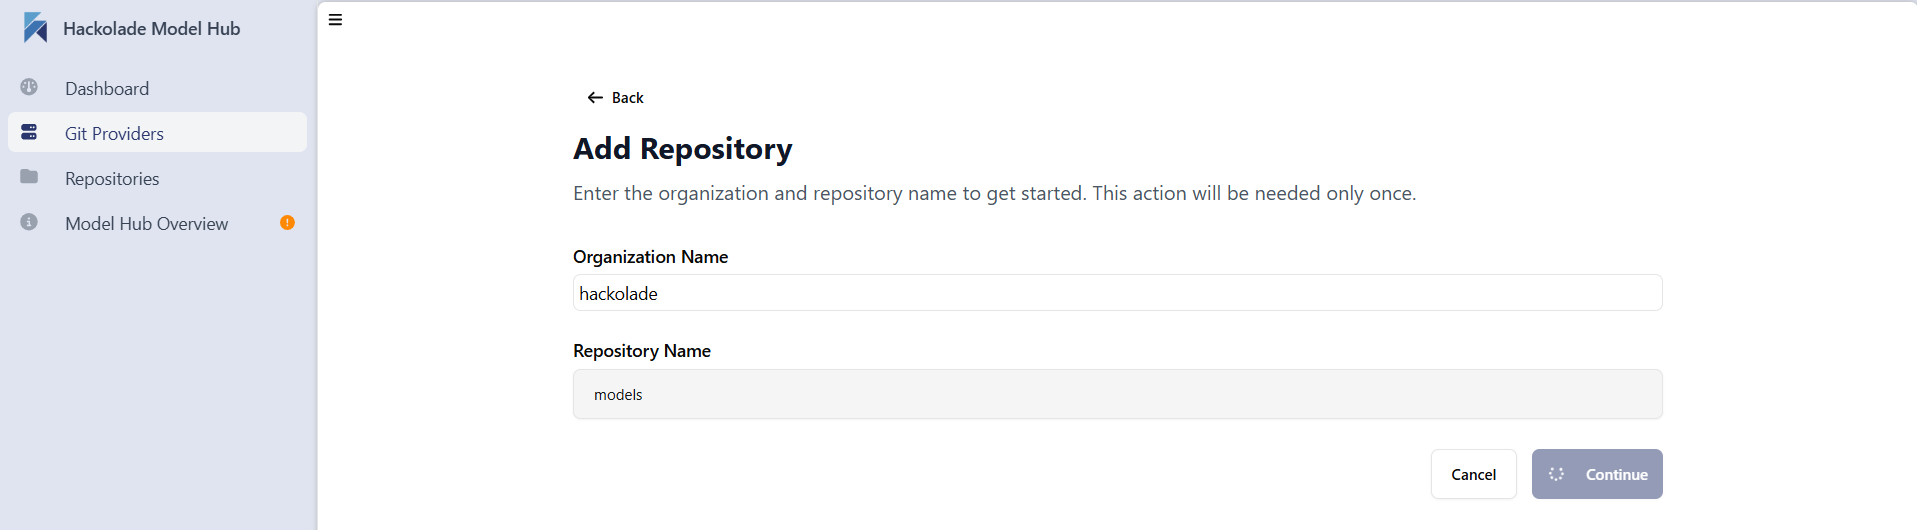
Click on the button to Save configuration. Then in the Add Repository screen, type the name of your organization in your Bitbucket Cloud instance. Then select the repository that you want to replicate to the Model Hub database:
You may edit the configuration at a later time if desired.
Troubleshooting
To check the status of the webhook, click on the Edit button, then scroll to the Recent events section at the bottom of the screen.
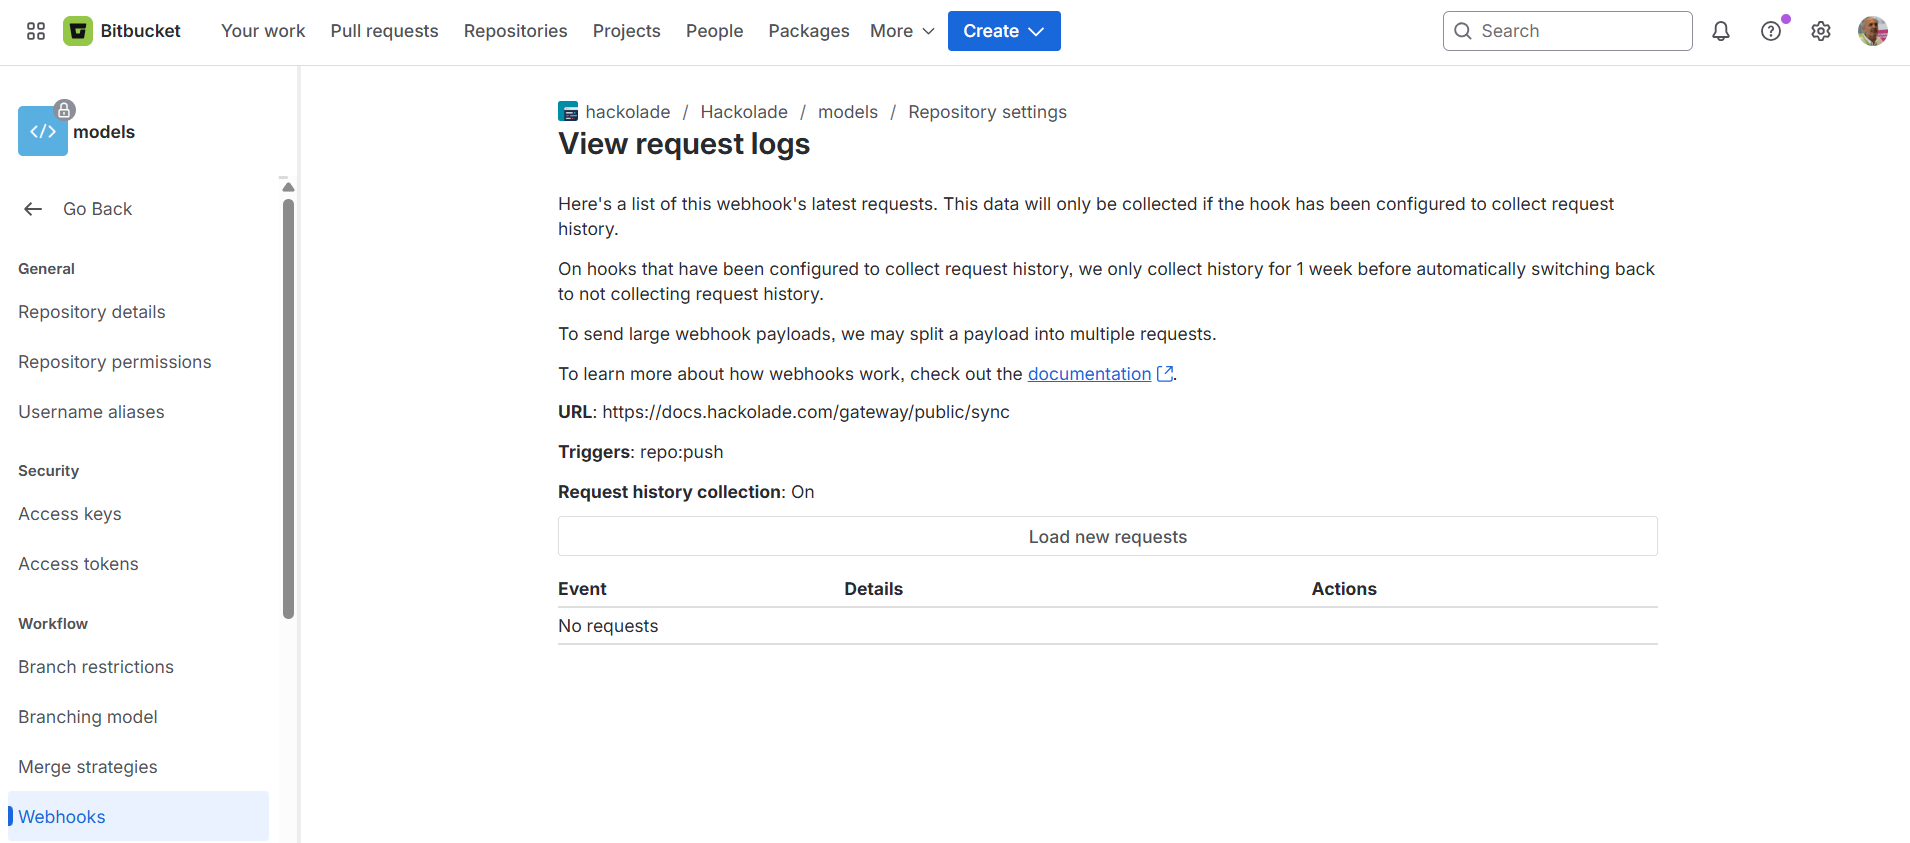
If a failure has occurred, it appears. Click the Event View details button and send it to support@hackolade.com for troubleshooting.